Text
Page: 1
IoT workshop for
firmware programming
with ESP32 and mruby/c
HASUMI Hitoshi (@hasumikin)
Monstar Lab, Matsue
March 16, 2019 in Matsue, Japan
May 6, 2019 in Warszawa, Polska
May 15, 2019 in Kraków, Polska
Page: 3
about me
HASUMI Hitoshi
@hasumikin
Ruby 💎
Sake 🍶
Soba 🍜
Coffee ☕
Page: 7
message from Matz
# # video
# # src = images/matz.mp4
Page: 8
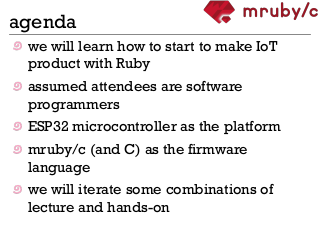
agenda
we will learn how to start to make IoT
product with Ruby
assumed attendees are software
programmers
ESP32 microcontroller as the platform
mruby/c (and C) as the firmware
language
we will iterate some combinations of
lecture and hands-on
Page: 9
agenda
we have 3 to 4 hours 😨
no worry, we will take several breaks
Page: 12
enquête
✋ please raise your hand ✋
✋ if you are a ✋
✋ firmware programming newbie ✋
Page: 13
enquête
✋ please raise your hand ✋
✋ if you don't have ✋
✋ any experience of mruby ✋
Page: 14
enquête
✋ please raise your hand ✋
✋ if you don't have ✋
✋ much experience of C language ✋
Page: 15
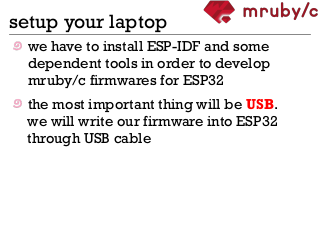
setup your laptop
we have to install ESP-IDF and some
dependent tools in order to develop
mruby/c firmwares for ESP32
the most important thing will be USB.
we will write our firmware into ESP32
through USB cable
Page: 16
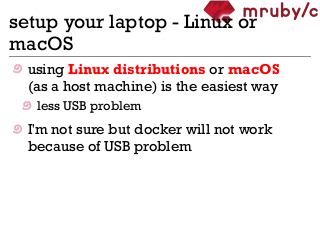
setup your laptop - Linux or
macOS
using Linux distributions or macOS
(as a host machine) is the easiest way
less USB problem
I'm not sure but docker will not work
because of USB problem
Page: 17
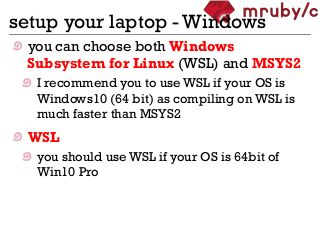
setup your laptop - Windows
you can choose both Windows
Subsystem for Linux (WSL) and MSYS2
I recommend you to use WSL if your OS is
Windows10 (64 bit) as compiling on WSL is
much faster than MSYS2
WSL
you should use WSL if your OS is 64bit of
Win10 Pro
Page: 18
setup your laptop - Windows
MSYS2
strongly recommended of using zipped
one which Espressif Systems maintenances
besides, note that only 32 bit version of
MSYS2 is available regardless of whether
your Windows is 64 bit or 32 bit
Docker for Windows
it appears not to work so far
but please tell me if it works
Page: 19
setup your laptop - VM
I (hasumi) use Linux Mint with
VirtualBox on Windows 10 Professional
but some people say that virtual
environments tend to have problems
around USB
Page: 20
setup your laptop
more information on
https://github.com/hasumikin
/IoT_workshop
Page: 21
setup your laptop
please tell me if you have any doubt
during the hands-on
Page: 22
Hands On 01
Hello mruby/c World!
open the URL
github.com/hasumikin/IoT_workshop
and find the link
Hands on 01
Page: 23
what is microcontroller?
if you are not familiar with
microcontroller, this section is very
important to grab overview what we do
in this workshop
Page: 24
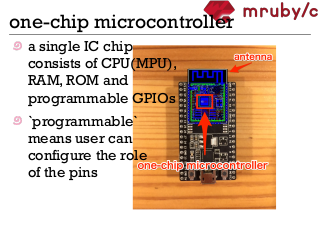
one-chip microcontroller
a single IC chip
consists of CPU(MPU),
RAM, ROM and
programmable GPIOs
`programmable`
means user can
configure the role
of the pins
Page: 25
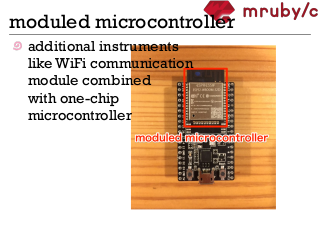
moduled microcontroller
additional instruments
like WiFi communication
module combined
with one-chip
microcontroller
Page: 26
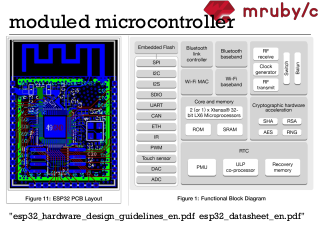
moduled microcontroller
"esp32_hardware_design_guidelines_en.pdf esp32_datasheet_en.pdf"
Page: 27
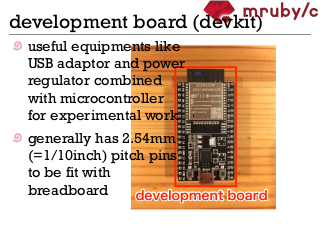
development board (devkit)
useful equipments like
USB adaptor and power
regulator combined
with microcontroller
for experimental work
generally has 2.54mm
(=1/10inch) pitch pins
to be fit with
breadboard
Page: 28
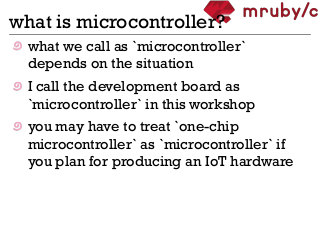
what is microcontroller?
what we call as `microcontroller`
depends on the situation
I call the development board as
`microcontroller` in this workshop
you may have to treat `one-chip
microcontroller` as `microcontroller` if
you plan for producing an IoT hardware
Page: 29
Hands On 02
Hello ESP32 World!
open the URL
github.com/hasumikin/IoT_workshop
and find the link
Hands on 02
Page: 31
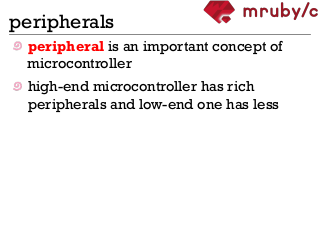
peripherals
peripheral is an important concept of
microcontroller
high-end microcontroller has rich
peripherals and low-end one has less
Page: 32
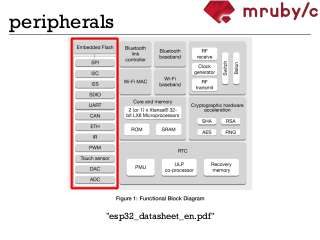
peripherals
"esp32_datasheet_en.pdf"
Page: 33
peripherals
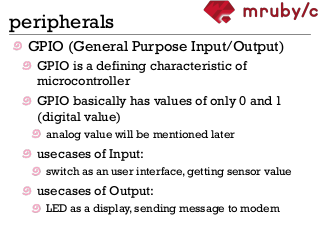
GPIO (General Purpose Input/Output)
GPIO is a defining characteristic of
microcontroller
GPIO basically has values of only 0 and 1
(digital value)
analog value will be mentioned later
usecases of Input:
switch as an user interface, getting sensor value
usecases of Output:
LED as a display, sending message to modem
Page: 34
peripherals
ADC (analog to digital converter) and
DAC (vice versa)
ADC converts analog value such as
microphone input into digital value that
computer can deal with
DAC converts digital value such as sound
data of MP3 into analog output in order to
play back the music on loud speaker
Page: 35
peripherals
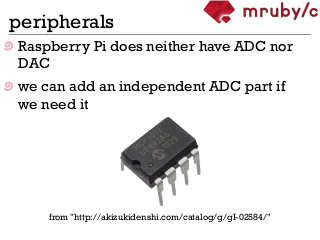
Raspberry Pi does neither have ADC nor
DAC
we can add an independent ADC part if
we need it
from "http://akizukidenshi.com/catalog/g/gI-02584/"
Page: 36
today's parts
breadboard
resistor
LED
thermistor
Page: 37
breadboard (protoboard)
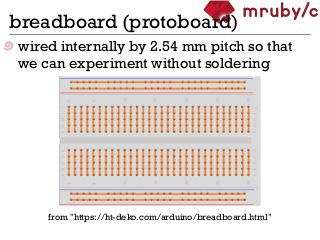
wired internally by 2.54 mm pitch so that
we can experiment without soldering
from "https://ht-deko.com/arduino/breadboard.html"
Page: 38
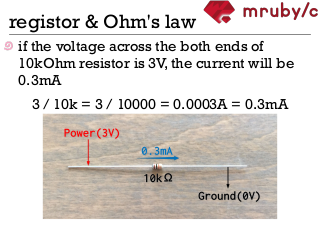
registor & Ohm's law
if the voltage across the both ends of
10kOhm resistor is 3V, the current will be
0.3mA
3 / 10k = 3 / 10000 = 0.0003A = 0.3mA
Page: 39
LED
A light-emitting diode (LED) is a
semiconductor light source that
emits light when current flows
through it.
[「WIKIPEDIA」より引用]
Page: 40
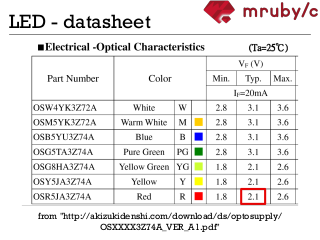
LED - datasheet
from "http://akizukidenshi.com/download/ds/optosupply/
OSXXXX3Z74A_VER_A1.pdf"
Page: 41
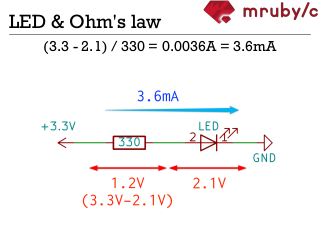
LED & Ohm's law
(3.3 - 2.1) / 330 = 0.0036A = 3.6mA
Page: 42
LED & GPIO
small LED can be lighten by GPIO
but instruments like huge LED which
requires high current can not be driven
even if its nominal voltage is less than
3.3V
because microcontroller has some limit
of supplying amount of electric current
incorrect usage may break your
microcontroller
Page: 43
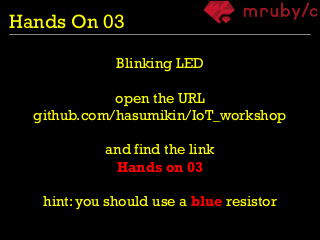
Hands On 03
Blinking LED
open the URL
github.com/hasumikin/IoT_workshop
and find the link
Hands on 03
hint: you should use a blue resistor
Page: 45
today's parts (again)
breadboard
resistor
LED
thermistor
Page: 46
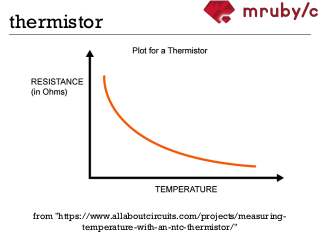
thermistor
A thermistor is a type of resistor whose
resistance is dependent on
temperature, more so than in standard
resistors.
[「WIKIPEDIA」より引用]
Page: 47
thermistor
from "https://www.allaboutcircuits.com/projects/measuring-
temperature-with-an-ntc-thermistor/"
Page: 48
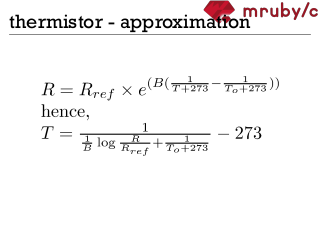
thermistor - approximation
Page: 49
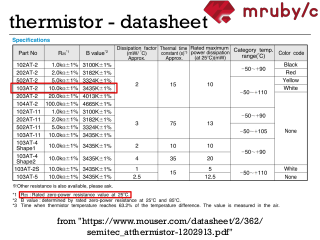
thermistor - datasheet
from "https://www.mouser.com/datasheet/2/362/
semitec_atthermistor-1202913.pdf"
Page: 50
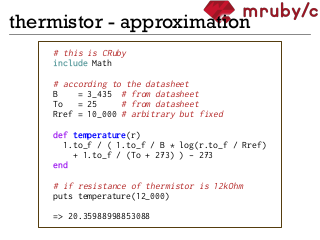
thermistor - approximation
# this is CRuby
include Math
# according to the datasheet
B
= 3_435 # from datasheet
To = 25
# from datasheet
Rref = 10_000 # arbitrary but fixed
def temperature(r)
1.to_f / ( 1.to_f / B * log(r.to_f / Rref)
+ 1.to_f / (To + 273) ) - 273
end
# if resistance of thermistor is 12kOhm
puts temperature(12_000)
=> 20.35988998853088
Page: 51
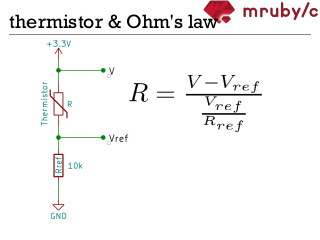
thermistor & Ohm's law
Page: 52
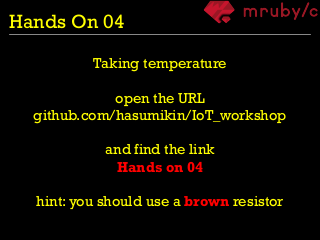
Hands On 04
Taking temperature
open the URL
github.com/hasumikin/IoT_workshop
and find the link
Hands on 04
hint: you should use a brown resistor
Page: 54
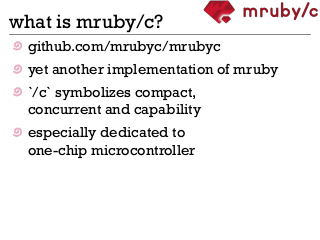
what is mruby/c?
github.com/mrubyc/mrubyc
yet another implementation of mruby
`/c` symbolizes compact,
concurrent and capability
especially dedicated to
one-chip microcontroller
Page: 55
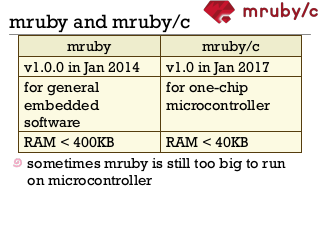
mruby and mruby/c
mruby
mruby/c
v1.0.0 in Jan 2014
v1.0 in Jan 2017
for general
for one-chip
embedded
microcontroller
software
RAM < 400KB
RAM < 40KB
sometimes mruby is still too big to run
on microcontroller
Page: 56
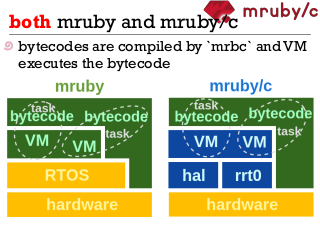
both mruby and mruby/c
bytecodes are compiled by `mrbc` and VM
executes the bytecode
Page: 57
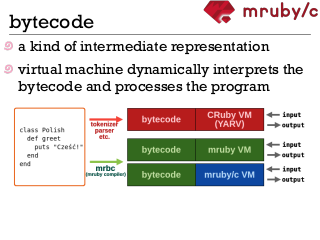
bytecode
a kind of intermediate representation
virtual machine dynamically interprets the
bytecode and processes the program
Page: 58
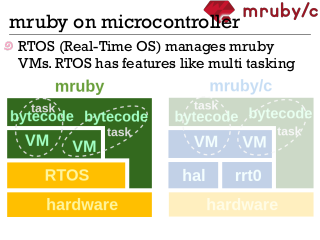
mruby on microcontroller
RTOS (Real-Time OS) manages mruby
VMs. RTOS has features like multi tasking
Page: 59
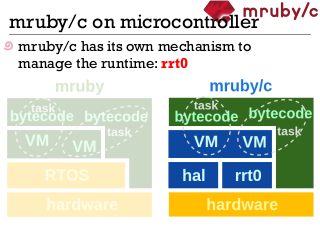
mruby/c on microcontroller
mruby/c has its own mechanism to
manage the runtime: rrt0
Page: 60
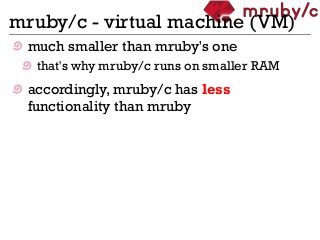
mruby/c - virtual machine (VM)
much smaller than mruby's one
that's why mruby/c runs on smaller RAM
accordingly, mruby/c has less
functionality than mruby
Page: 62
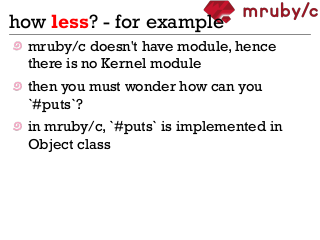
how less? - for example
mruby/c doesn't have module, hence
there is no Kernel module
then you must wonder how can you
`#puts`?
in mruby/c, `#puts` is implemented in
Object class
Page: 63
how less? - for example
mruby/c doesn't have #send, #eval, nor
#method_missing
moreover, mruby/c neither have your
favorite features like TracePoint nor
Refinements 😞
Page: 64
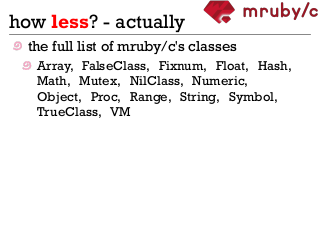
how less? - actually
the full list of mruby/c's classes
Array, FalseClass, Fixnum, Float, Hash,
Math, Mutex, NilClass, Numeric,
Object, Proc, Range, String, Symbol,
TrueClass, VM
Page: 65
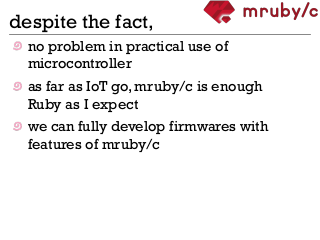
despite the fact,
no problem in practical use of
microcontroller
as far as IoT go, mruby/c is enough
Ruby as I expect
we can fully develop firmwares with
features of mruby/c
Page: 66
Hands On 05
Multi-tasking with mruby/c
open the URL
github.com/hasumikin/IoT_workshop
and find the link
Hands on 05
Page: 68
conclusion
All you need is Ohm's law


![LED
A light-emitting diode (LED) is a
semiconductor light source that
emits light when current flows
through it.
[「WIKIPEDIA」より引用]](38.png)


![thermistor
A thermistor is a type of resistor whose
resistance is dependent on
temperature, more so than in standard
resistors.
[「WIKIPEDIA」より引用]](45.png)












![LED
A light-emitting diode (LED) is a
semiconductor light source that
emits light when current flows
through it.
[「WIKIPEDIA」より引用]](mini-38.png)

![thermistor
A thermistor is a type of resistor whose
resistance is dependent on
temperature, more so than in standard
resistors.
[「WIKIPEDIA」より引用]](mini-45.png)
